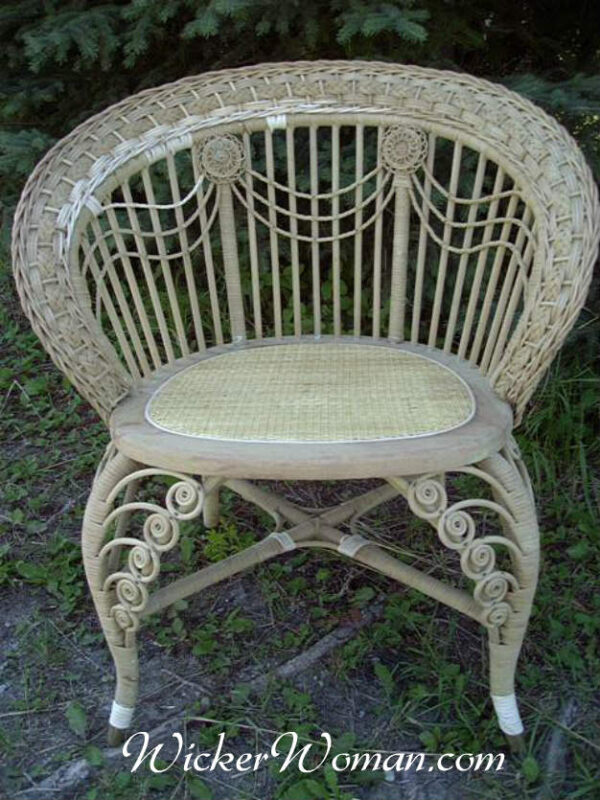
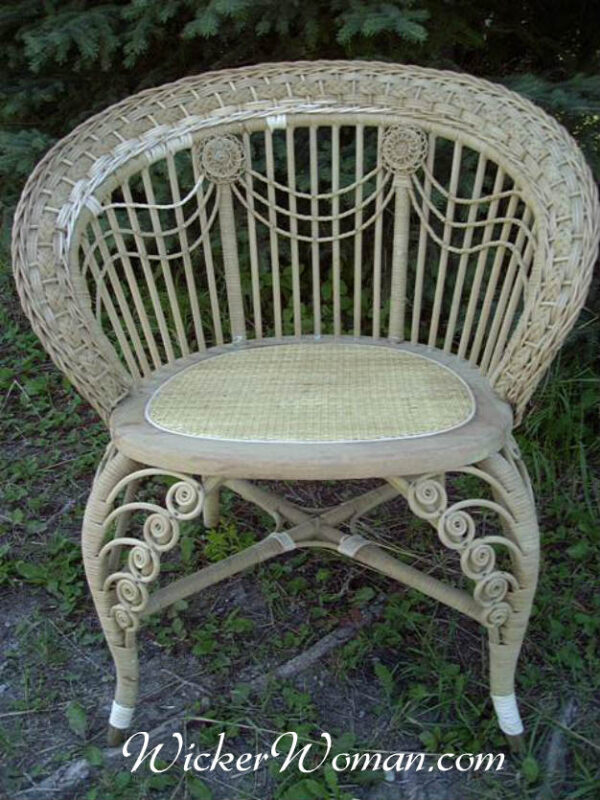
This lovely little heavily embellished wicker woman’s chair is an authentic Heywood Brothers and Wakefield Company lady’s or photographer’s chair. I’ll show you some of what I had to do to restore it to its nearly original state.
This article may contain affiliate links, which means that if you click on a link and then purchase an item, I may receive a commission at no cost to you. As an Amazon Associate, I earn from qualifying purchases.
This beautiful wicker chair is listed in the book, Heywood Brothers and Wakefield Company Classic Wicker Furniture, The Complete 1898-1899 Illustrated Catalog. The Victorian lady’s chair is depicted on page 33 or [65 & 66] of the original catalog, listed as a Lady’s Arm Chair, #6041 A.
RELATED READING: Visit my Amazon Store for this book and ones like it
The following pictures show some of the many repairs I made to this lovely wicker chair to bring it back to its former glory.
With its curlicue-covered front legs, soft woven swag ribbons, two delicately woven reed rosettes on the back, and swooping woven fan back, it was simply stunning.
The chair had been painted many times over the years, so my customer took it to a furniture refinisher/stripper who removed the layers of paint before bringing it to me for the wicker repairs.
RELATED READING: Need TLC for your furniture? Check out the Pros that will get the job done!
The piece had existing damage before the stripping, and this process required additional effort to bring it back to nearly its original state.
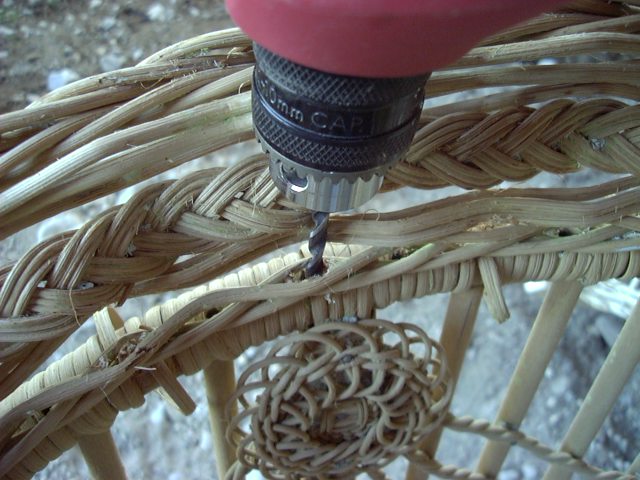
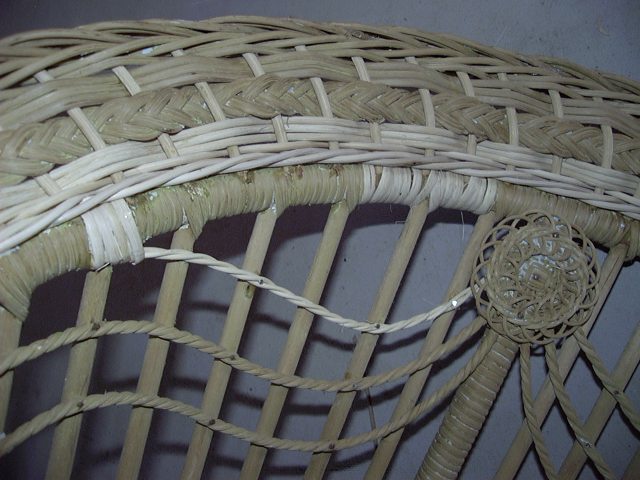
I used Brad-point drill bits to remove the rattan reed spokes from their holes so the drill would be stable and not skip around on the oak framework of the chair.
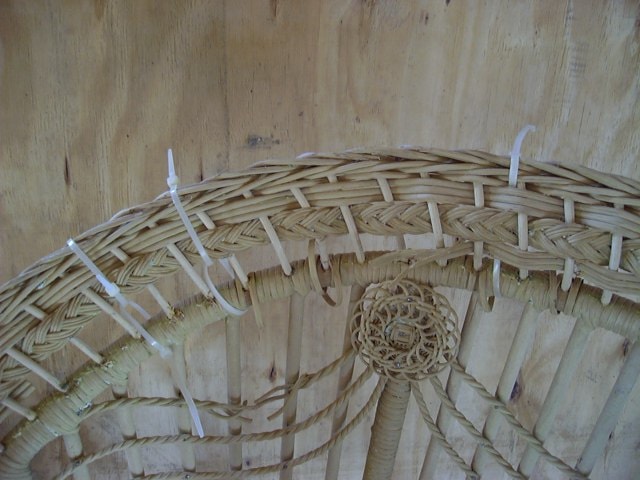
After removing all the reed and glue from the holes, the next step was to rewrap the frame. I removed all the old wrappings and replaced with new flat-oval reed to match the original.
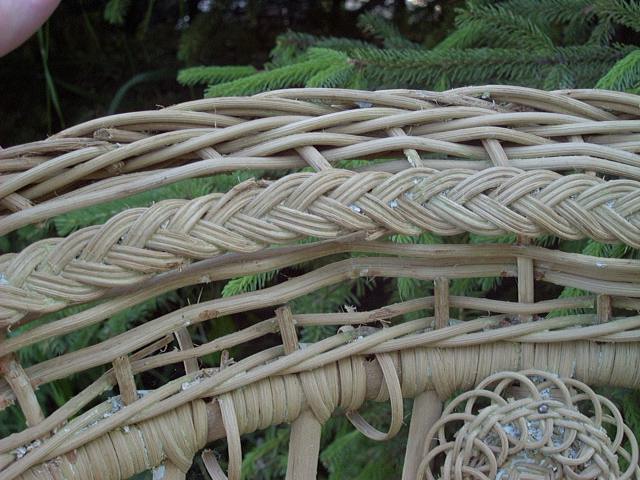
Once that was done, I proceeded to insert the new spokes and weave the ends into the braided rim of the swooping back.
RELATED READING: Need rattan reed for your wicker projects?
The close-woven seat needed to be replaced, six curlicues were broken and had to be replaced, the spokes and braid in arms/back were broken, the swag reed rope needed replacing, and minor leg wraps were done, too.
RELATED READING: How to install cane webbing seat
This piece, with its fancy braid work around the back, two ornate and delicate reed rosettes, swag reed rope, many, many curlicues, and close-woven sheet cane seat, was a joy to restore. It is simply a marvelous old piece—and quite comfortable, too!
The client was going to decide on the final finish, which would be either stain and varnish or painting, and she was going to do it herself.
RELATED READING: How to paint wicker furniture

What are your thoughts about this blog post?
Leave your comments below and share with your social networks!
~~Live Well, Laugh Often, Love Much ~~
Happy Weaving, until next time!