Several years ago, I repaired/restored a 1900s-1920s small child’s wicker rocker for a customer who had used it when she was young. I believe she said this family heirloom wicker rocker had been in the family since the early 1920s.
I stumbled across more old pictures of the rocker during the repair process that had been on an old floppy disk used in my old Panasonic digital camera from back in the 1990s. So here are the photographs of the repairs made, step by step.
The owner was going for the “shabby chic” look here, so didn’t want to remove the old red paint from the frame. I wouldn’t have either, I think it’s darling as is in flaky, chipped red paint, don’t you? Enjoy!
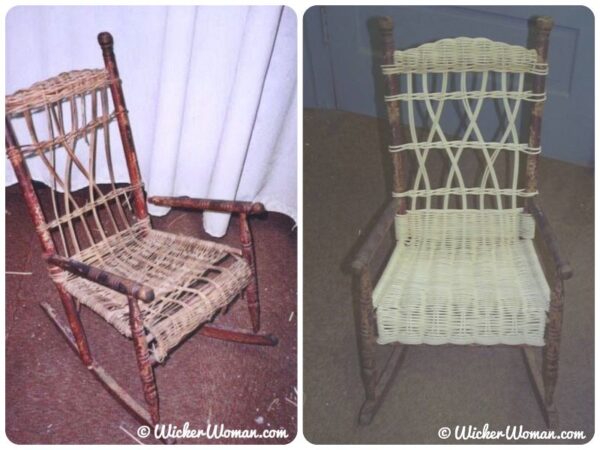
Step #1. The damage was extensive and the round rattan reed was pretty dried out. The rattan reed strands were broken and crumbling throughout the seat and back of this family heirloom wicker rocker. So, almost all of the deteriorated rattan reed had to be removed and replaced with new rattan reed material.
Related Reading: Shop these suppliers for all your wicker needs.
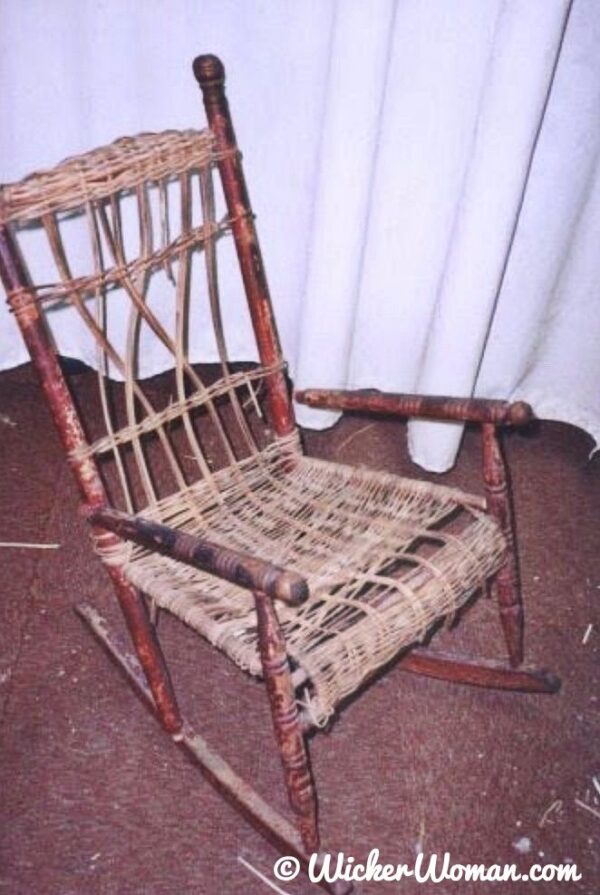
Step #2. I did, however, leave the old strands of rattan reed to use as a pattern to go by in reweaving the new rattan reed spokes and weavers. But I’ve already taken off most of the reed weavers and spokes in this photo.
Related Reading: What is Rattan Reed?
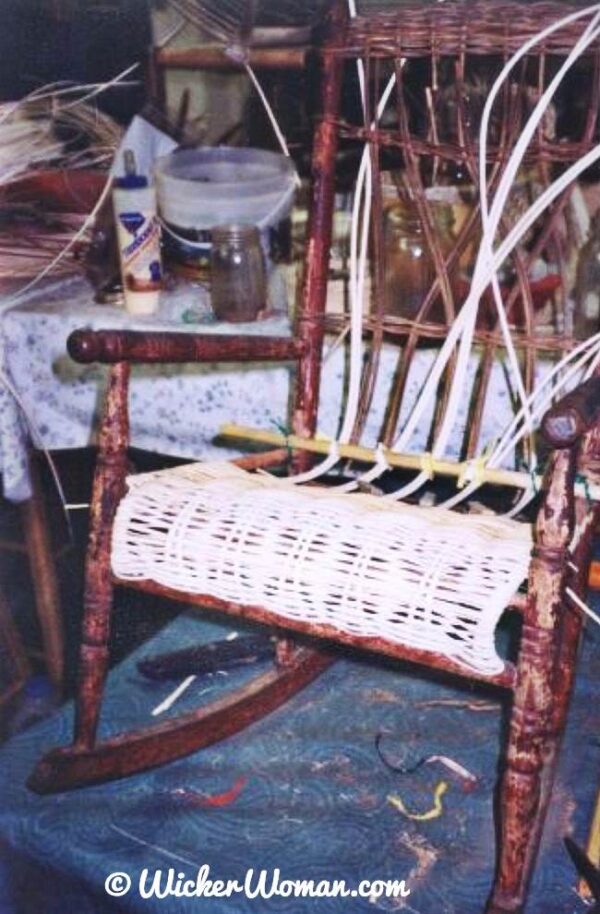
Step #3. Here I’m replicating the pattern in the seat and back exactly as it was originally made on this little child’s wicker rocker. I was using twist ties and wooden dowels to hold all the spokes in place and removed them after I moved farther along in the repair process.
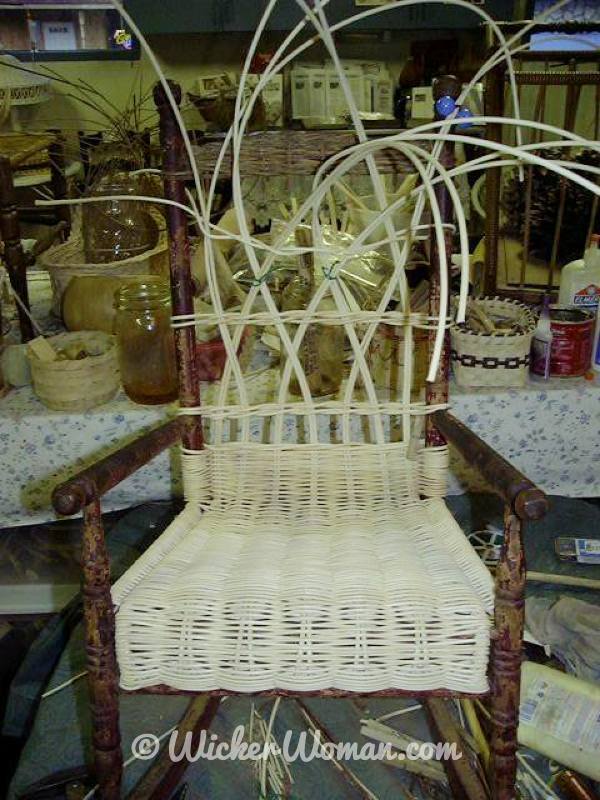
Once I finished weaving the seat, I moved up to do the “fitching” X weave on the back, tying the vertical strands together with rows of horizontal twining.
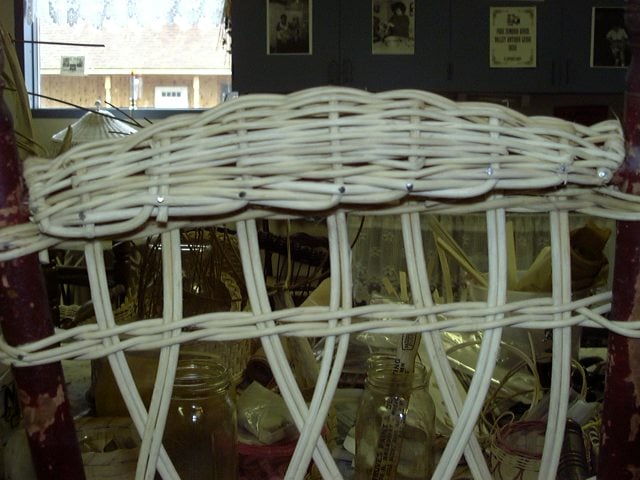
Step #4. Here’s the cute little child’s wicker rocker all finished. The rolled and arched wicker back headrest area and fitched “X” design on the back are all done in this photo.
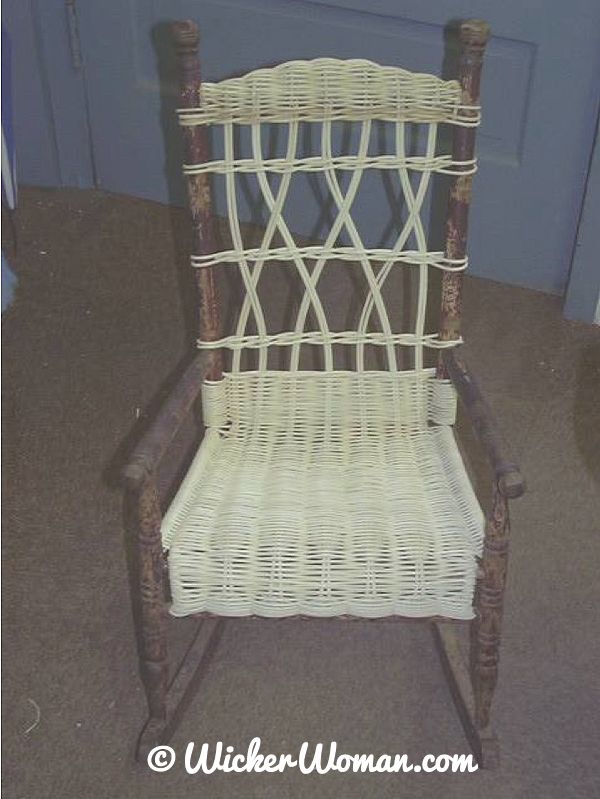
Step #5. This darling child’s wicker rocker from the early 1900s is completely repaired and ready to be either painted or stained by the customer. She was ecstatic and looking forward to giving it the final finish coat of paint.
Isn’t this just the cutest thing you’ve ever seen? This is the perfect place for a teddy bear, dolly, or even a grandchild to rock away a lazy afternoon!

What are your thoughts about this blog post?
Leave your comments below and share with your social networks!
~~Live Well, Laugh Often, Love Much ~~
Happy Weaving, until next time!


Cathryn:
I have done only small wicker repairs on buggies and chairs as I feel I have the basics down. But I have turned away many more jobs as I felt they were over my head or the work that was needed cost far more then the chair was worth. Are there any U-tube videos or books that would help me get better at this. I recently picked up a child’s wicker rocker that has had it’s back supports cut off and a tombstone type back rest put in its place. It also has a pressed cane seat in it. I thought this might be a nice little winter project for me to learn on.
Hi James,
I don’t think there are any YouTube videos out on wicker repair, but you surely could do a search there to find out. But I do have a couple wicker repair pages here on the site, have you looked at them yet? Look under the How-to Articles tab called “How-to Repair Wicker Rocker” as well as a slideshow on repairing a Heywood Wakefield sewing cabinet under the Helpful Resources tab called, “Wicker Repair Process.”
And as far as books go, there’s an excellent old one (1983) out by Thomas Duncan called, “How to Buy and Restore Wicker Furniture” that you can purchase using my Amazon affiliate link on the right sidebar here and on the Homepage. Or you can use the Amazon Shop the Bookstore on the left sidebar on the Homepage. https://astore.amazon.com/thewicwom-20
Good luck, take your time and also purchasing some English willow basketweaving books would be a good idea. All the wicker repair techniques first came from basketweaving, as you probably already know! Cathryn
Cathryn, Fabulous job ! Loved the pics !