Are you familiar with these three chair caning design samples below? Did you know there were three different chair caning methods and design patterns, not just two?
Here are three types of woven cane chair seats I did a while ago for clients I think you might enjoy seeing.
See if you recognize them and name the weaving technique, too, just for fun. Then, let me know in the comments below how well you did on this little quiz.
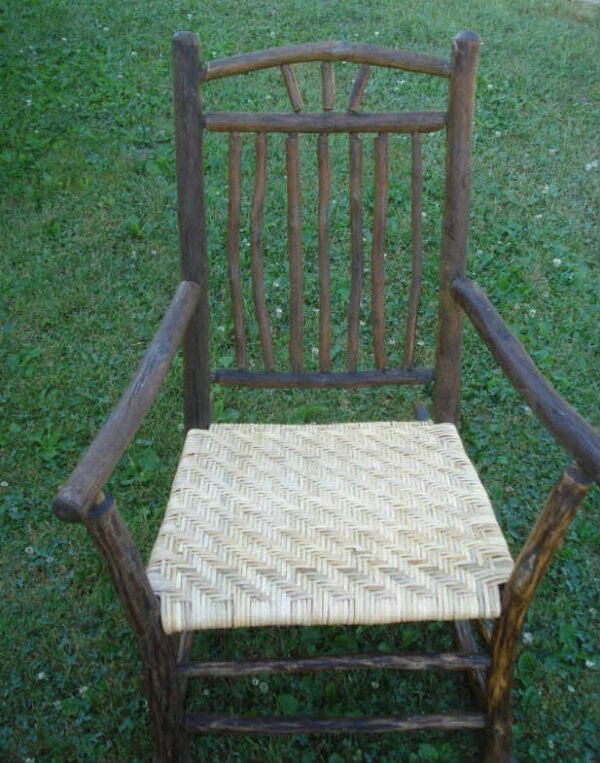
#1. wide binding cane seat
I wove this wide binding cane (6MM) seat on what I believe to be an Old Hickory rocker, made by the Indiana Chair Company, or it’s a copy from another chair manufacturer of the time.
This rocker was most likely made in the 1920s or 1930s.
However, we would need to see the manufacturer’s label to be absolutely certain of its origin and age.
I couldn’t find a label anywhere on the piece, but nevertheless, isn’t she a beauty?
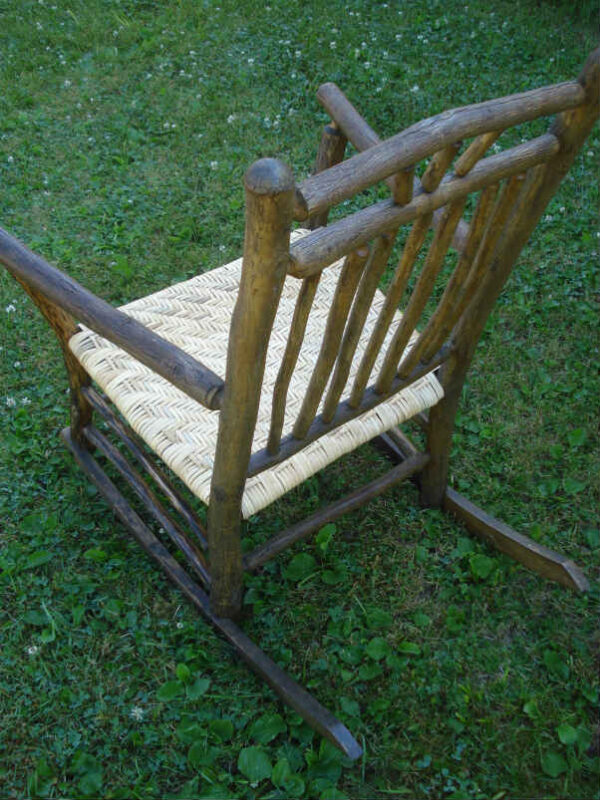
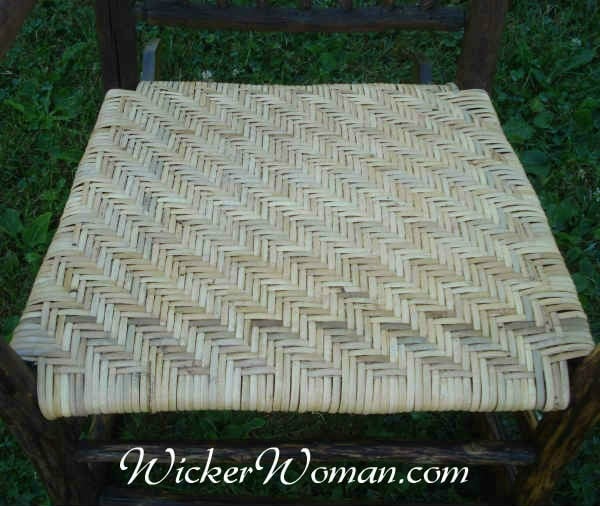
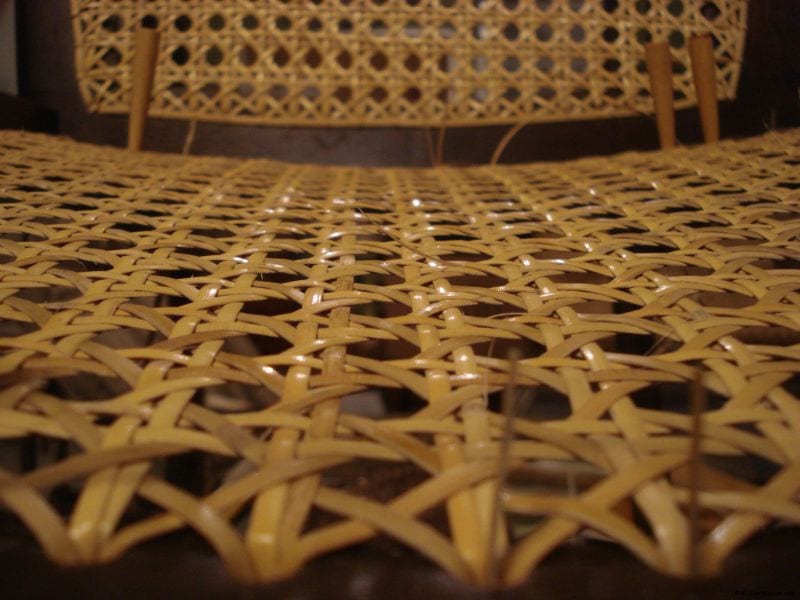
On this wide-binding cane seat example, the individual strands of cane are typically woven in an over-three, under-three, (3×3) twill pattern on the top side of the seat.
The pattern continues around the rails and is woven in the same manner on the bottom using a 4×4 or 5×5 twill.
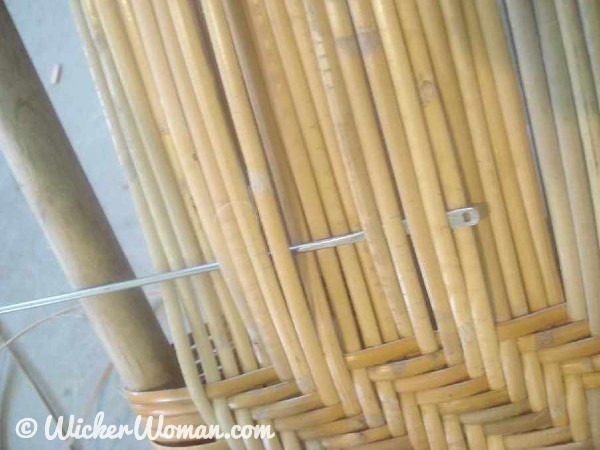
This larger 4×4 pattern is faster to weave than the smaller 3×3 twill, and since it’s on the bottom of the seat and no one sees it, most weavers choose the larger pattern on the bottom. Some weavers even boost that count up to 5×5 twill pattern.
By weaving on both the top and bottom and around the rails, the weaving pattern creates an empty pocket in the center of the seat.
So, sometimes, to relieve the pressure on the cane when someone sits in it, the weaver will pad the inside pocket with a sheet of foam cut to size or use crumpled paper or Excelsior, finely spun wood shavings to pad the seat.
Adding non-waterproof padding materials to the pocket is usually reserved for furniture that is used indoors and not exposed to the weather elements.
#2. spline cane, machine-woven, pressed cane, cane webbing
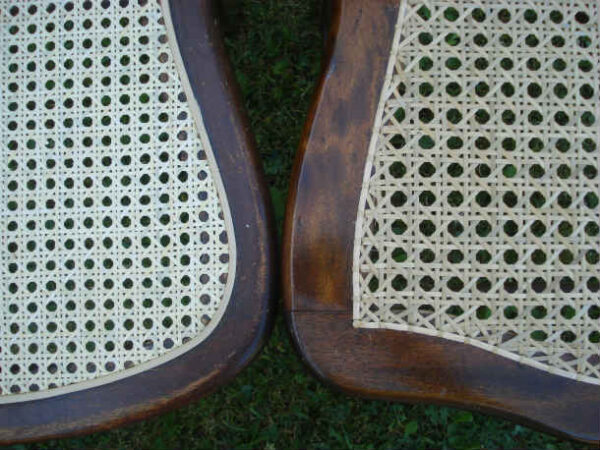
The spline cane chair on the left in the picture below has a routed-out channel on the top side of the seat. A sheet of machine-woven cane webbing is tamped down into the channel. Then it’s held in place with white glue or hide glue and a “V” shaped piece of rattan reed “spline.”
Because of the various terms for the materials, this type of cane chair is sometimes referred to by many different names and can be confusing.
So, what do you call this kind of chair seat weaving; “spline cane”, “cane webbing”, “machine-woven” or “pressed cane”? Let me know in the comment section below.
#3. Traditional, hole-to-hole, strand cane, “lace” caning
The chair on the right in the photo above is a hole-to-hole cane chair seat.
It’s called hole-to-hole because holes are drilled around the perimeter of the wooden chair frame, completely through the wood.
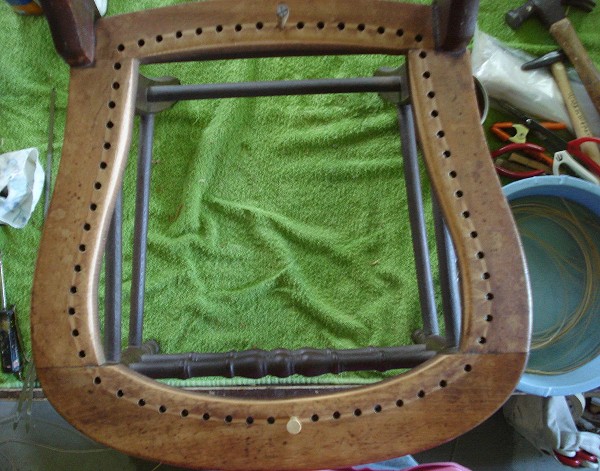
This is where the strands of cane are individually woven in a 7-step pattern going from one hole to the next, looping from hole to hole, underneath the seat.
The first three steps of weaving, front to back and side to side, establish the foundation of the pattern. Then the fourth horizontal step begins the actual weaving.
Steps five and six are the diagonals; they go both from the lower left to the upper right and from the lower right to the upper left.
The seventh and final step of the weaving is “sewing” the binder cord on the top side to cover the holes, giving the seat a nice and finished look. As a result, establishing the distinctive open-weave, hexagonal design we all know and love.
Well, how did you do on identifying the three chair caning design samples
Were you able to correctly identify all three?
Please let me know in the comments below. And be sure to also take a look at the Weaving Basics Articles to learn about caring for your cane furniture and get more helpful hints and tips!

What are your thoughts about this blog post?
Leave your comments below and share with your social networks!
~~Live Well, Laugh Often, Love Much ~~
Happy Weaving, until next time!



Hi Kathrine, Thanks for your interesting presentation on these types of caning. I have recently done several jobs with seven hole caning, but it most enjoy the old hickory chairs with wide binder cane or slab rattan. Being listed in your directory has been great for getting started in a new location. Happy Weaving!
Hi Rodney,
Thanks so much for your comment on these various chair caning designs. And thank you for being a long-time member of the National Furniture Repair Directory™. I’m so happy your new location listing in Ohio is getting great results!
Got them all of course. Finishing some danish cord seats and wonder about protecting the cord from stains. Any ideas. Maybe scotchgard
Good for you Jeannie, I knew you’d get all of them, being a long-time chair caner. As far as a protecting the Danish cord seats go, I have used Scotchgard in the past, but the Danish cord has its own wax finish to it that’s supposed to keep stains at bay. So, its entirely up to you whether you treat the cord seat or not. I don’t believe the chairs made by the manufacturers in Denmark, Sweden or Norway are treated in any way, though.
I am redoing a wicker love seat . It’s not a valuable Victorian piece. My goal is to make it attractive and sturdy. There’s a broken center medallion that I could use some help with.
Hi Deborah,
Congratulations on repairing your wicker loveseat and I hate to burst your bubble, but depending on how big and intricate the cane center medallion is they can be very difficult to reweave. Or maybe you are referring to a Spiderweb or Star of David cane weave?
What is your level of chair caning expertise and have you ever done wicker furniture repair before? Either way, I would recommend you get some instruction books to add to your personal reference library.
Each of these three are available in my Amazon Store–These are the best The Caner’s Handbook/em> by Jim Widess or The Craft of Chair Seat Weaving by George Sterns, or Chair Seating by Johnson, Barratt and Butcher for instructions on weaving either of these fancy cane designs and for actual cane center medallions. Good luck on your project!
What is the easiest design to weave since I’m a newbie and have 4 chair seats to reweave?
Victoria it really depends on what kind of chair frame you have and what materials you need/want to apply to that frame. If you have a post-and-rail chair frame with a trapezoid seat (wider in the front than in the back), a simple 3×3 twill using 1/2″ flat reed would be the best to start out with. Then you can move on to the more complicated paper rush patterns, and even checkerboard seagrass on the post-and-rail frames. And if you have the type of cane chair with the groove around the top of the seat, the only type of weaving that can and should be used in that one is sheet cane or cane webbing. If you have the holes drilled through the frame of the chair seat, then the 7-step method of hand-caning would be the simplest pattern. Hope that answers your question. Have fun trying out the different patterns and weaving materials, the sky is the limit!