chair caning tips: 3 tools you must have
This page may contain affiliate links since WickerWoman.com is a participant in the Amazon Services LLC Associates Program, an affiliate advertising program designed to provide a means for sites to earn advertising fees by advertising and linking to Amazon.com. When you make a purchase through one of these links, I receive a small compensation without any extra cost to you.
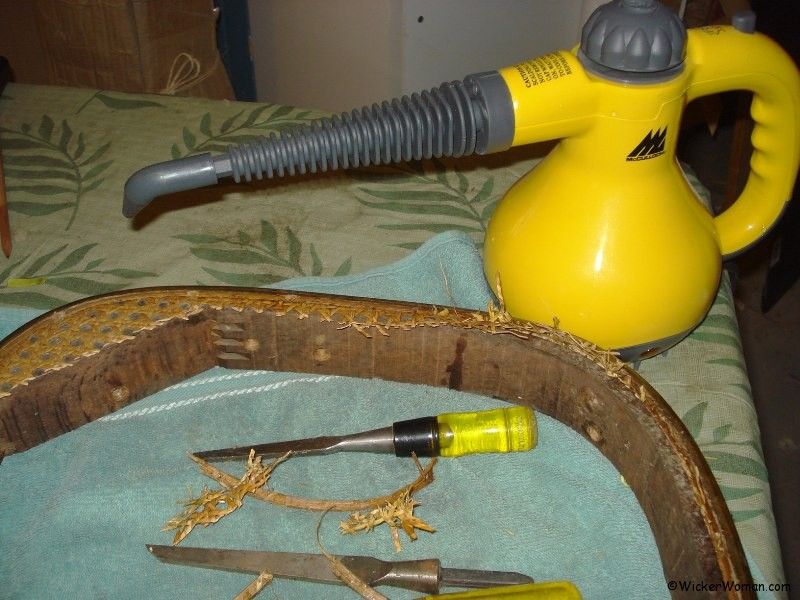
1. hand-held steamer
Use a hand-held steamer, similar to the one in the picture to soften and remove the glue in the groove of a spline cane chair seat. It makes very quick work of removing the old cane and spline.
I’m forever grateful to have learned this technique from the members of The SeatWeavers’ Guild, Inc. so many years ago!
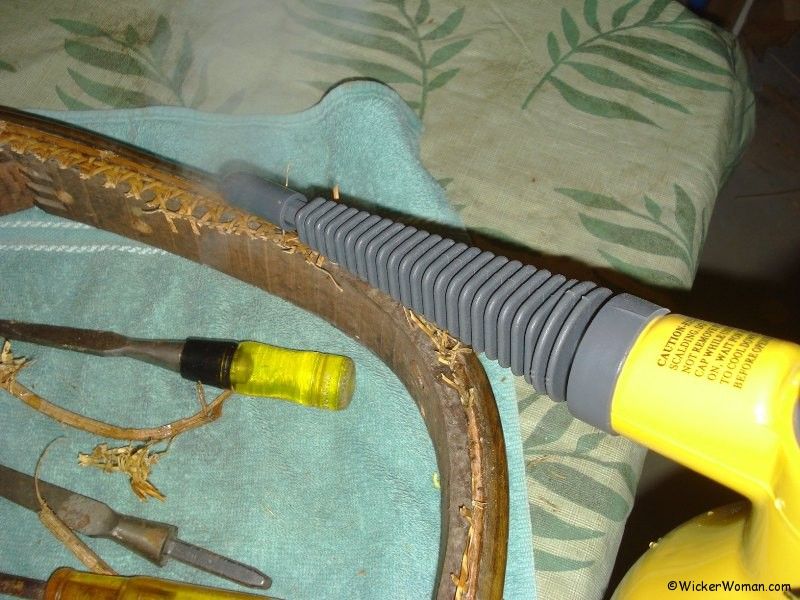
How to use the hand-held steamer for spline removal
Once you see how easy this makes spline removal, you’ll wonder why it took you so long to discover this tool. What a time saver! You’re welcome!
First, you will want to protect the wooden finish with either green or blue painter’s tape , which is what I forgot to do in this photo. Thankfully, the finish didn’t get damaged, so I was lucky. So, do as I say, not do as I do…
Next, drill several holes through the spline. Be very careful not to drill too far into the spline and go into the wood frame.
Finally, using short bursts of steam in the drilled holes will soften the glue. Then, with the glue softened, removing the spline with your special spline caning chisel will be as quick as a wink.
Here’s a YouTube video I made on How-to Remove Chair Cane Spline with a Steamer so you can see it in action.
2. Chair Caning Use for Ice Pick
Do you find that sometimes there are just too many cane strands in the holes, making it almost impossible to get any more in there? Well, here’s the tool you need, enjoy!
How to fix crowded drilled cane holes in the frame
Frequently, you will find that the holes drilled into the framework of a hand-caned seat fill up very quickly as you are weaving the seven steps.
The reason for this is that several strands of cane are going into the same small hole, narrowing the opening. This makes it very difficult to add more new strands to those holes.
Plus, doing the final step of adding a binder to cover the holes is extremely frustrating, too. Because you are adding yet two more strands to the holes, the cane coming up the back side of the hole, then another one going down the front side of the hole.
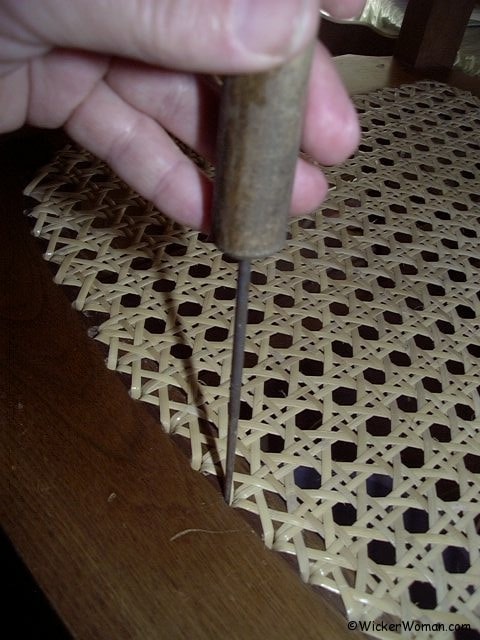
The solution to this problem is to use an icepick or long shank, thin awl
  to make room in the drilled holes.
You can do this by putting the icepick into the hole and “reaming” it out, making a circular pattern with the top end of the ice pick, forcing all strands to the outer circle of the hole below.
Eureka! Now you can insert more strands in the center of the hole! Easy, peasy!
Final Chair caning tool I can’t live without
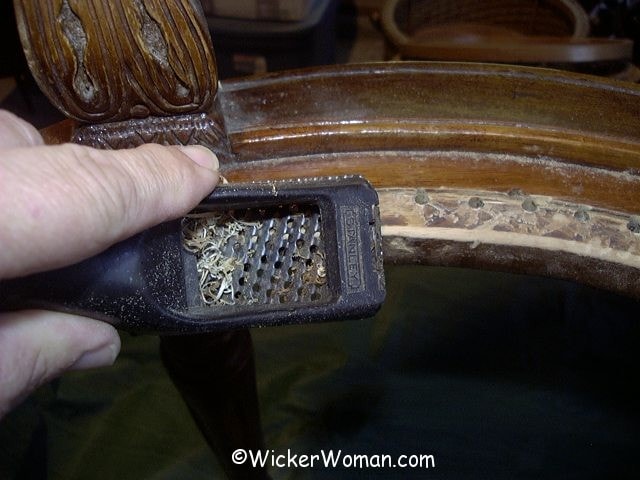
3. Add life to the seat-keep it from breaking
As I’ve shown in my instructions for weaving a hole cane seat, I always bevel or round off the inside edge of the chair seat frame. That inside part of the seat frame has a 90º edge to it that is really sharp and can cut the cane over time.
How to soften sharp wooden edge
After the cane seat has been used for a time, it will begin to sag, and once it does, that sharp edge of the wooden seat frame will cut the material, and your cane seat will fail prematurely.
The solution is to use either a wood rasp or this handy Stanley Surform Shaver
 to bevel, round or soften that sharp edge. Then, go over it all with a piece of sandpaper to smooth the newly sanded edge so there are no more sharp spots.
Always remember that no matter what kind of seat you are putting in, hole cane, sheet cane, rush, splint or even Shaker tape and Danish cord, be sure to bevel or round off all the flat, inside rail edges. If the rails are already round, of course, this rule doesn’t apply.
Now, you know to round off and soften the sharp inside edge of all the chair seats you weave. So you won’t have any more problems with the sharp wooden edge cutting that cane you worked so hard on replacing. Excellent!
Let me know in the comments below, if this Chair Caning Tools Tips post has helped you! What are your favorite chair caning tools?

What are your thoughts about this blog post?
Leave your comments below and share with your social networks!
~~Live Well, Laugh Often, Love Much ~~
Happy Weaving, until next time!


I am starting a new chair project. This particular chair has trim on the front that seems to be a part of the corners. It looks like I have no choice except to feed one strand at a time between the rail and trim. Do you have any tips for weaving this kind of chair. This is an Ethan Allen chair from 60’s.
Hi MJ,
I’m not sure what type of cane seat you are talking about. Is this seat a pressed in or cane webbing with a spline around the perimeter? Or is it a hole-to-hole cane seat with the binder cord around the perimeter? Have you compared your chair seat to the examples on this page of my site? https://www.wickerwoman.com/articles/identify-woven-seat-patterns I would be happy to do a consultation with you too, just contact me and we can set up a date and time.
I have not tried the rasp to do this, I use a sander to round the edge of the chairs. I may have to try this tool. I also find the ice pick a handy tool many times when caning a chair.