Tuesday Tip of the Day—The first step in weaving paper rush seats is to fill in the side rail gussets or to “square up” a trapezoidal seat.
You are probably wondering why you’d need to square up the chair seat in the first place, right? Well, that’s a relatively easy answer.
This article may contain affiliate links, which means that if you click on a link and then purchase an item, I may receive a commission at no cost to you. As an Amazon Associate, I earn from qualifying purchases.
Why “square up” a rush seat?
Most chairs are designed to be wider in the front than in the back, called a trapezoid, to make sitting in them as comfortable as possible.
In the rush seat weaving pattern or design, the weaver must take a continuous strand of rush around each of the four corners of the chair seat, starting at the outer edge and ending up in the middle.
If the seat is square, weaving it is no problem because all sides are equal in length. But when weaving a trapezoidal seat, the front rail is longer than the back rail and must be accounted for.
How to “square up” a rush seat
To “square up” the trapezoidal rush seat or make both the front rail and the back rail the same length, you need to fill in the side rail gussets first.
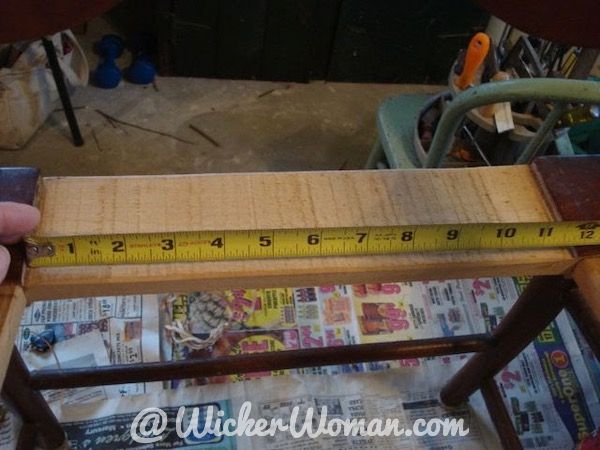
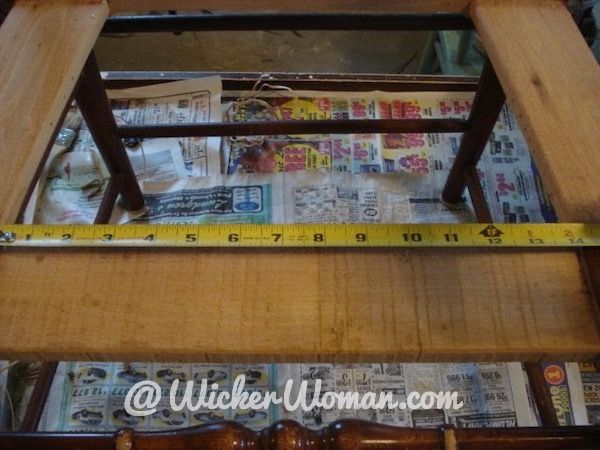
To do that, you’ll need to measure the back rail and the front rail using a tape measure.
Determine just how much longer the front rail is from the back.
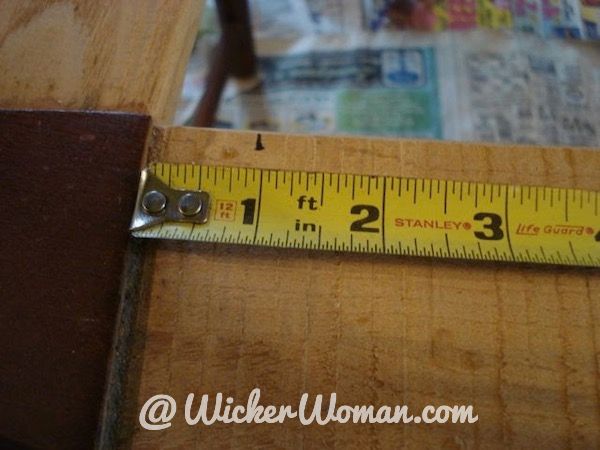
Take the difference and divide it in half, then take that half measurement out from the corner and make a mark.
The length between the marks should be equal to the back rail.
Measure out from each corner at the front rail and mark each spot so you know where the short rows of weaving need to go.
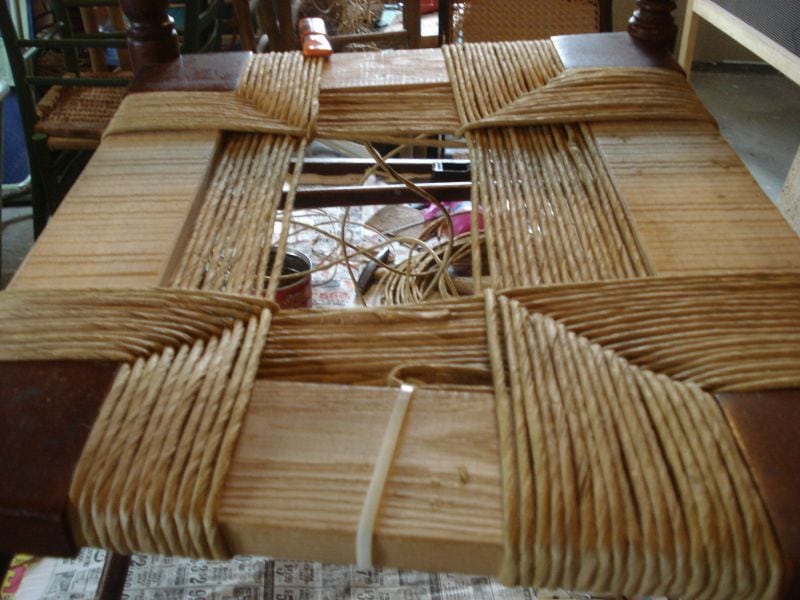
Now, between the marks and the corners, you’ll need to fill in those gussets with short lengths of rush.
Once the distance between the front rail is the same width as the back rail, then you will have a square seat and can weave continuously around each corner.
Two ways to “square up” a rush seat
There are many methods used to “square up” the seat of a trapezoidal (wider in the front than in the back) chair seat. In this post, I’ll be showing you two ways of doing it.
Attach Rush Strands with Tacks
The first method, a tried-and-true old way of attaching the short strands needed to “square up” the seat, was to nail the ends of the paper rush to the inside left and right side rails using #3–3/8″ upholstery tacks.
This solution worked well for me for many years and in most cases, but sometimes, all those tacks and nails damaged the side rails.
Look at all the upholstery tacks that were used on the fragile seat rail below.
So, when or if you use upholstery tacks to attach your paper rush strands, be especially careful.
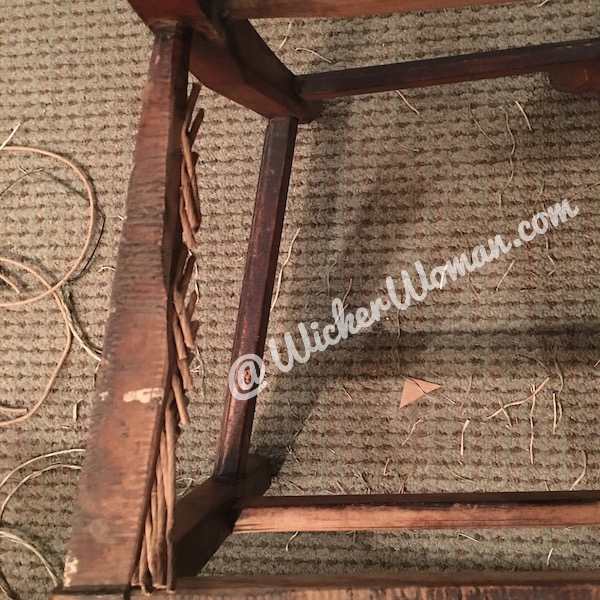
Damage was especially true if the rails were round dowels and/or narrow or small in diameter.
Attach Rush Strands with Cable Ties
Many years into my profession, I ran across another way to attach those rush strands to the side rails that worked really, really slick!
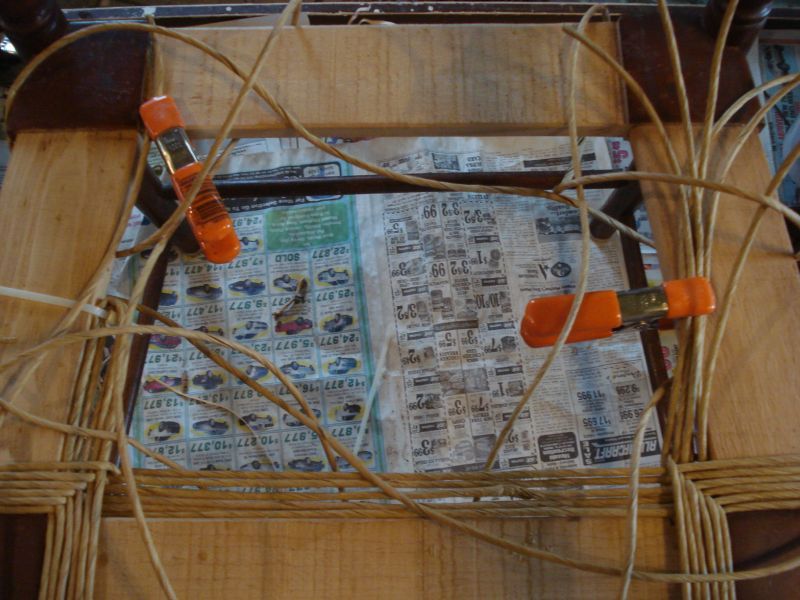
Attach the pre-measured paper rush strands to the side rails using a cable tie instead of tacks, which might damage the rails!
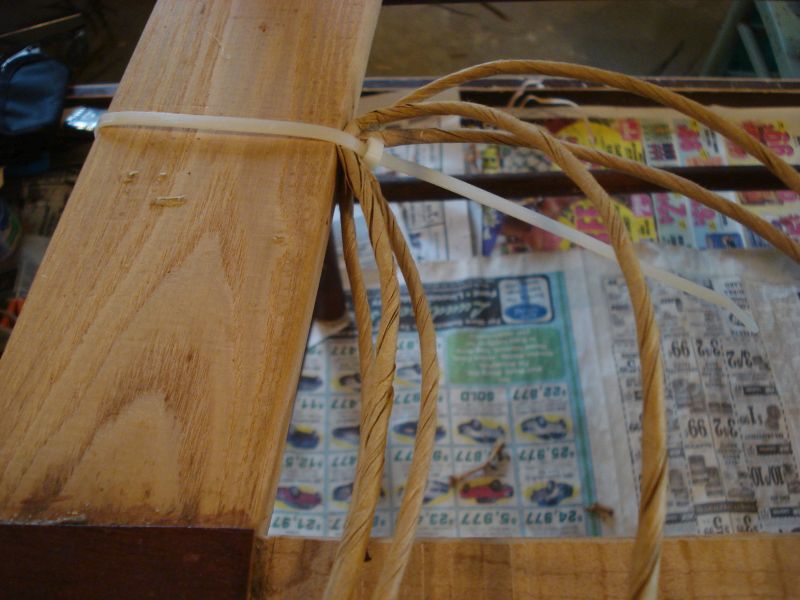
Fold the rush strands over in half and then attach the cable tie in the middle of the fold to the left-side rail.
Using this method, the rails are not damaged, and by using several rush strands held by the cable tie, the weaving can be done easily and rapidly.
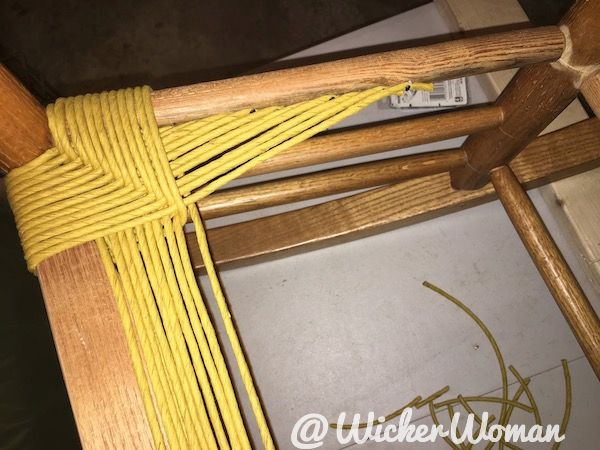
Weave each strand in succession, one at a time. When you get to the end of a strand, clip it to the right side rail using a spring clamp!
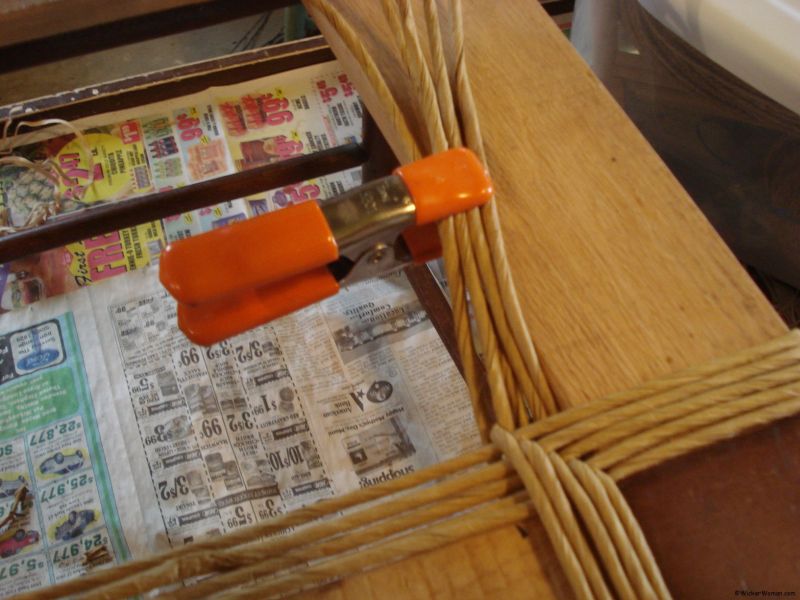
Leave the clamp on those ends as long as possible. Then, as you weave around all four corners, those rush ends will be held in place with the friction and pressure of each wrap.
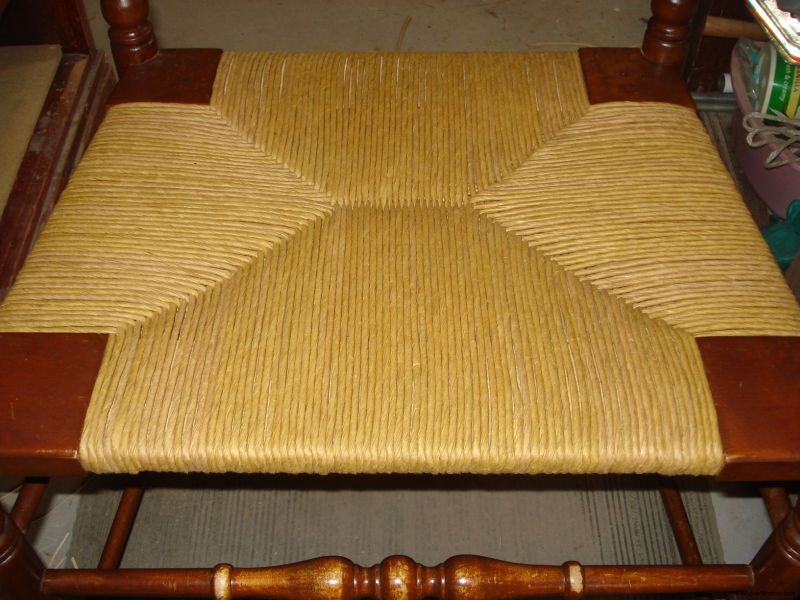
Once you have finished filling in the gussets or “squaring up” the rush chair seat, making the front rail the same length as the back rail, you can begin weaving around all four corners until you finish weaving the chair seat.
Have you tried using this terrific time and chair-saver, using cable ties to square up a rush seat, Tuesday Tip of the Day, yet? Once you do, you’ll love it!
FURTHER READING: What’s the fourth way to start a paper rush seat?
What tips do you use for “squaring up” those paper rush gussets?

What are your thoughts about this blog post?
Leave your comments below and share with your social networks!
~~Live Well, Laugh Often, Love Much ~~
Happy Weaving, until next time!


This is great. one question- what did you do with the strands on the right rail? I didn’t see a cable tie on that side.
Shelly,
If you will look at the two pictures showing the rush chair seat in progress and look on the right side, you will see that those paper fibre ends in the gussets are held on with a spring clamp. That way, it’s easy to add the remaining ends when you fill in the gussets to “square up” the rush chair seat. Sorry you missed that.
But what happens to those ends when you remove the clamps to finish the weaving?
Hi Jeanette,
The ends of the short strands ends of rush that are held in place with the clamps will be held in place with the other rounds of weaving. You leave the clamps on as long as possible then when going around all four corners, those ends will automatically be held in place with friction. Hope that helps!
Really we can’t even imagine that how many uses of cable ties are there is our life and in which ways we can use it.
Thank you Susan for posting your Leco Plastics website link here, great to know where we can get such cool supplies as the cable or zip ties in mass quantities!